
Arduino and Node.js Energy Monitor
A little box that monitors the mains current and average room temperature and sends the data through WiFi to a server for storage, display and analysis.
Uses a TMP36 temperature sensor (like this) and a non-invasive current sensor (like this one), coupled with a Wifi Shield (this one here).
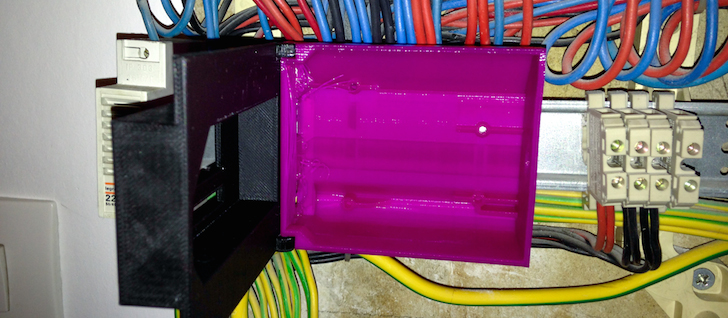
The box is the same size as a conventional NF EN 60898-1, and NFC 61-410 compliant circuit breaker, so it fits in your electrical panel.
Code
The repo contains :
- the Arduino UNO code
- A little Node.js server to receive the data
Arduino code
The Arduino code is separated in different files, for ease of comprehension.
-
CentralCurrentAndTempLogger.inois just here so the Arduino IDE is happy -
helpers.inodefine a general set of helper functions, likereadVcc() -
display.inocontains all the initialization processes for the 7-segment and the led strip -
wifi.inocontains all the functions to work with WiFi -
current.inohas all we need to compute current and temperature sensors -
main.inoandsetup.inoare self-explanatory.
NB : these files are prefixed so that the compiler knows in which order to process them. This is required because in the Arduino IDE, there is no general file that imports every single file, so in order to define the compilation order, we need to rely on the filenames.
The configuration is stored in config.h. You need to copy config.h.dist to config.h and put your own settings (wifi, key) in there.
If you want to change the payload, you might want to look at lines 66to 72 in wifi.ino :
    client.print(encodedLength(str_temp) + encodedLength(str_power) + encodedLength(private_key) + 10);
    client.fastrprint(F("\r\n\r\nt="));
    urlEncode(client, str_temp, false, false);
    client.fastrprint(F("&w="));
    urlEncode(client, str_power, false, false);
    client.fastrprint(F("&key="));
    urlEncode(client, private_key, false, false);
NB : it is advised to compile and upload the code with the Arduino IDE 1.0.5 version that can be found here because the CC3000 shield is not really a big fan of the newer IDE releases.
Server code
Of course, the server can be any application that can accept and process requests such as :
POST 1.0 /data key=123456789ABCD&w=346&t=23.5
The Node.js server provided is a very simple logger that stores the values in a file.
To launch the server, you first need to copy config.json.dist to config.json and put your own settings (log name, api path, key) in there.
Then, as for every standard Node.js app :
node index.js
About the key parameter
It's a very simple authentication system to prevent unwanted request to the server. Change for something only you know. The key must obviously be the same on the Arduino and on the server.
Electronics
I created a custom PCB to hold the electronics (apart from the Arduino shield). It's designed on Fritzing which is a very practical tool.
The custom shield holds the connectors and some basic electronics. It is very simple to solder on your own.
BOM for the custom shield :
- 1x 1000µF capacitor
- 1x 10µF capacitor
- 2x 10kΩ
- 2x 200Ω
- 1x 47Ω
- 1x Stereo TRS connector (jack 3.5mm)
- Some pin headers
- 1x jst connector 3pin and x jst connector 4pin
To create the PCB, I use Fritzing Fab as well.
Other parts needed :
- some wires
- 1x Arduino UNO
- 1x Adafruit CC3000 WiFi Shield
- 1x antenna
- 1x TMP36 temperature sensor
- 1x non-invasive 30A current sensor
- 1x Quad Alphanumeric Display - 0.54" Digits w/ I2C Backpack
- 1x NeoPixel Stick - 8 x WS2812 5050 RGB LED with Integrated Drivers
Casing
The casing consists of 3 3D-printable parts :
- the box in itself
- the closing lid
- the lid inset
All these parts are 3D printable on a regular Rep Rap or Makerbot Replicator 2 for instance. The STL files (watertight, ready for print) are available in the Design/Boîtier folder.
 A first prototype
The CATIA files (.catpart and .catproduct) are available as well if you want to refactor them for your need.
To dim the displays and add a somehow nice touch to the objet, the fourth part is a little 3mm-thick plexiglass slap that can be cutted on a conventional laser cutter.
You can find the Illustrator file here.
Licence
Everything is released under the GNU GPL v2. Basically, you can reuse everything as long as you credit me somehow :)