
StreamUI
🎥 〜StreamUI: Make videos with SwiftUI (and even stream them to Youtube, Twitch, etc)
MIT License
〜StreamUI [BETA!]
🎥 Make videos programmatically with SwiftUI (and even stream them live to Youtube, Twitch, or more). I am still actively developing this and testing it so please give feedback!
What is StreamUI?
StreamUI is a library designed for SwiftUI that enables developers to create dynamic videos programmatically. It goes beyond traditional video generation tools like Remotion, offering real-time video rendering and live streaming capabilities. Ideal for applications ranging from faceless Tiktok/Youtube shorts videos to live event broadcasting, and much more. StreamUI lets you create video templates in SwiftUI and render them with dynamic inputs.
If you are familular, StreamUI is a SwiftUI alternative to the following, that supports things they do not like live streaming:
This video is 100% SwiftUI code generated with StreamUI 👇
Video created with StreamUI. See example code here
https://github.com/StreamUI/StreamUI/assets/775808/99176027-a4f2-459f-a180-cc02a00f9ee9
-
Real-Time Video Rendering Generate and manipulate video content on the fly using Swift code. Integrate animations, text overlays, and media, adapting dynamically to user interactions or external data.
-
Live Streaming Broadcast live video streams directly from your application. You can create videos with SwiftUI that stream in realtime. So you could be receiving events from outside which then gets reflected into the live stream in real time. Magic!
-
Dynamic video generation Generate dynamic videos. Pull in data from your database, react to outside events, generate batches of videos in different sizes, AB test videos in bulk. You can do it all.
| Why StreamUI & why create videos with SwiftUI? | |
|---|---|
| 📡 | The only programatically generated video library that supports Live streaming capabilities to platforms like YouTube and Twitch |
| 🔄 | Videos are rendered in Real-time instead of requiring you to render on serverless functions in a parellel manner |
| 💻 | Leverage Swift's power and SwiftUI's declarative syntax |
| 🎨 | Create reusable video templates with SwiftUI |
| 🔧 | Highly customizable and extensible. Use variables, functions, API calls, remote events, access your database, pull in remote images/audio/video and incorporate any of those into dynamically generated videos |
| 📊 | Generate batches of videos with different params, sizes or more variables for A/B testing |
Requirements
If people want support for < less please open a ticket. I wanted to use @Observable which meant I needed to be on Sonoma. But I could very well fall back to @ObservableObject if there is demand.
- Xcode 15+
- Swift 5.10
- MacOS Sonoma
Get started
-
Download the starter:
git clone https://github.com/StreamUI/streamui-starter
-
Or start from scratch, and create a Package.swift file
// swift-tools-version:5.10 import PackageDescription let package = Package( name: "MyNewExecutable", platforms: [ .macOS(.v14), ], dependencies: [ .package(url: "https://github.com/StreamUI/StreamUI.git", from: "0.1.2"), ], targets: [ .executableTarget( name: "MyNewExecutable", dependencies: [ .product(name: "StreamUI", package: "StreamUI"), ] ), ] ) -
Make sure target is MacOS
-
Simple Example
import StreamUI
import SwiftUI

public struct SwiftUIVideoExample: View {
    @Environment(\.recorder) private var recorder

    @State private var currentImageIndex = 0

    let imageUrls = [
        "https://sample-videos.com/img/Sample-jpg-image-5mb.jpg",
        "https://mogged-pullzone.b-cdn.net/people/8336bde2-3d36-41c3-a8ad-9c9d5413eff6.jpg?class=mobile",
        "https://mogged-pullzone.b-cdn.net/people/0880cf5d-10d1-49b2-b468-e84d19f5bdca.jpg",
        "https://mogged-pullzone.b-cdn.net/people/08c08ae7-732e-4966-917f-f94174daa024.jpg",
        "https://mogged-pullzone.b-cdn.net/people/0a4f6fc6-bc77-4b4a-9dfb-c690b5931625.jpg"
    ]

    public init() {}
    public var body: some View {
        VStack {
            StreamingImage(url: URL(string: imageUrls[currentImageIndex])!, scaleType: .fill)
                .frame(width: 1080, height: 1920)
                .id(currentImageIndex)
        }
        .onAppear(perform: startTimer)
    }

    private func startTimer() {
        Task {
            while true {
                try await recorder?.controlledClock.clock.sleep(for: .milliseconds(1000))
                currentImageIndex = (currentImageIndex + 1) % imageUrls.count
            }
        }
    }
}


let recorder = createStreamUIRecorder(
    fps: 30,
    width: 1080,
    height: 1920,
    displayScale: 2.0,
    captureDuration: .seconds(30),
    saveVideoFile: true,
     livestreamSettings: [
        .init(rtmpConnection: "rtmp://localhost/live", streamKey: "streamKey")
    ]
) {
	SwiftUIVideoExample()
}

recorder.startRecording()

try await Task.sleep(for: .seconds(5))
recorder.pauseRecording()
try await Task.sleep(for: .seconds(10))
recorder.resumeRecording()

// Wait for the recording to complete
await recorder.waitForRecordingCompletion()
-
swift run or build xcode
-
Video will automatically stop recording after the specified time and if specified will start live streaming!
Docs
createStreamUIRecorder
| Property | Required | Type | Description |
|---|---|---|---|
| fps | ✓ | Int32 | The frame rate for capturing the view. |
| width | ✓ | CGFloat | The width of the capture area. |
| height | ✓ | CGFloat | The height of the capture area. |
| displayScale | ✓ | CGFloat | The scale factor for the display. |
| captureDuration | Duration? | The duration for which to capture the view. | |
| saveVideoFile | Bool | Whether to save the captured video to a file. | |
| livestreamSettings | [LivestreamSettings]? | Settings for live streaming, such as RTMP connection and bitrate. | |
| content | ✓ | SwiftUI View | A SwiftUI view builder that provides the content to be captured. |
Description
Creates a UI recorder that captures a SwiftUI view at a specified frame rate and resolution, optionally saving the video file and configuring live stream settings.
Usage Example
let recorder = createStreamUIRecorder(
    fps: 30,
    width: 1920,
    height: 1080,
    displayScale: 2.0,
    captureDuration: .seconds(7),
    saveVideoFile: true
) {
    Text("Hello, Stream!")
        .font(.largeTitle)
        .foregroundColor(.white)
}
LivestreamSettings
| Property | Required | Type | Description |
|---|---|---|---|
| rtmpConnection | ✓ | String | The RTMP connection URL for streaming. |
| streamKey | ✓ | String | The stream key for authentication with the streaming server. |
| profileLevel | String? | The profile level for encoding. | |
| bitRate | Int? | The bitrate for streaming. |
Description
A structure that holds configuration settings for live streaming, including RTMP connection details, stream key, optional profile level, and bitrate.
Usage Example
let settings = LivestreamSettings(
    rtmpConnection: "rtmp://live.example.com/app",
    streamKey: "exampleStreamKey"
)
StreamUI
| Property | Required | Type | Description |
|---|---|---|---|
| fps | ✓ | Int32 | The frame rate for capturing the view. |
| width | ✓ | CGFloat | The width of the capture area. |
| height | ✓ | CGFloat | The height of the capture area. |
| displayScale | ✓ | CGFloat | The scale factor for the display. |
| captureDuration | Duration? | The duration for which to capture the view. | |
| saveVideoFile | Bool | Whether to save the captured video to a file. | |
| livestreamSettings | [LivestreamSettings]? | Settings for live streaming, such as RTMP connection and bitrate. | |
| content | ✓ | SwiftUI View | A SwiftUI view builder that provides the content to be captured. |
Description
This is very much like the createStreamUIRecorder except it should pop up a view to see a live preview of whats being recorded and give you buttons to stop recording. It's not overly functional yet, but long term i'd like to have a more full fledged controls. createStreamUIRecorder is more versatile and could be integrated into MacOS apps, Viper (probably?). But StreamUI is good to see whats going on and iterate on your views.
Usage Example
struct MyStreamableView: View {
    var body: some View {
        StreamUI(
            fps: 30,
            width: 1920,
            height: 1080,
            displayScale: 2.0,
            saveVideoFile: true
        ) {
            Text("Streaming Live!")
                .font(.largeTitle)
                .foregroundColor(.white)
        }
    }
}
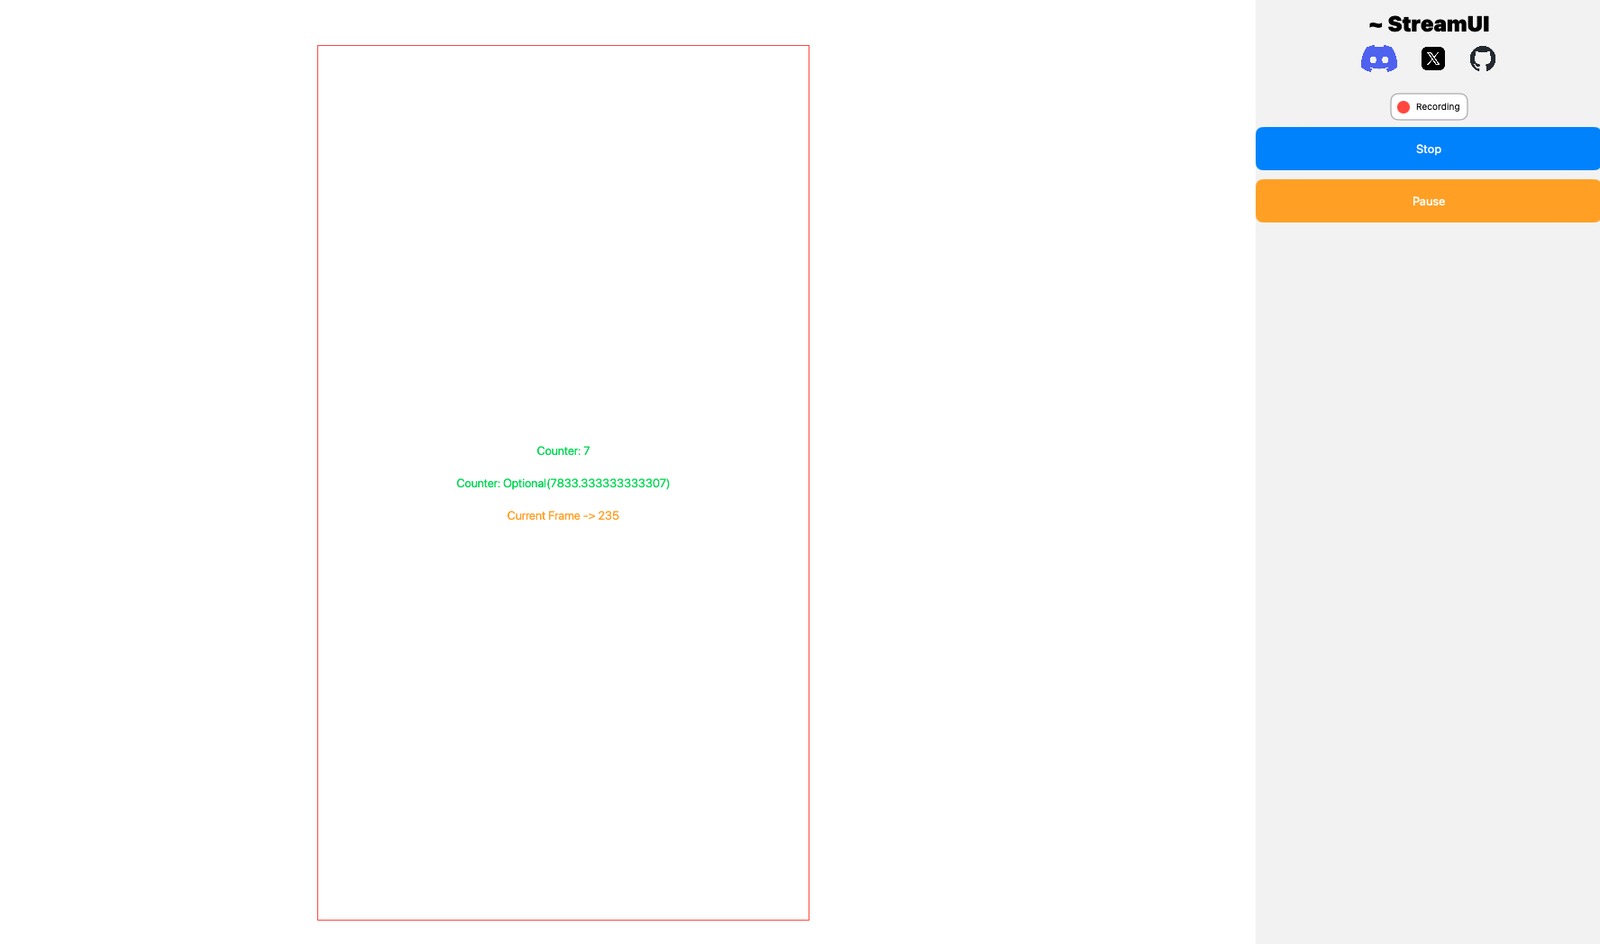 Screenshot of the StreamUI wrapper interface
Recorder methods
| Method | Description |
|---|---|
| startRecording | Begins the recording process. Sets the state to recording and starts the frame timer. |
| pauseRecording | Pauses the recording process. Increments the pause counter and pauses all audio and video recording. |
| resumeRecording | Resumes the recording process if it was paused and the pause counter reaches zero. |
| stopRecording | Stops the recording process. Stops all audio recording and sets the state to finished. |
| waitForRecordingCompletion | Waits asynchronously for the recording to complete. |
| loadAudio | Loads audio from the specified URL, pausing the recording during the load process. |
| playAudio | Plays audio from the specified URL. |
| stopAudio | Stops audio playback from the specified URL. |
| pauseAudio | Pauses audio playback from the specified URL. |
| resumeAudio | Resumes audio playback from the specified URL. |
Description
A collection of methods for managing the recording and playback of audio within the Recorder class.
Usage Example
let recorder = Recorder()
recorder.startRecording()
// Recording is now in progress...

recorder.pauseRecording()
// Recording is paused...

recorder.resumeRecording()
// Recording is resumed...

recorder.stopRecording()
// Recording is stopped...

await recorder.waitForRecordingCompletion()
// Waits for the recording to complete...

try await recorder.loadAudio(from: URL(string: "https://example.com/audiofile.mp3")!)
// Loads audio from the specified URL...

recorder.playAudio(from: URL(string: "https://example.com/audiofile.mp3")!)
// Plays audio from the specified URL...

recorder.pauseAudio(from: URL(string: "https://example.com/audiofile.mp3")!)
// Pauses audio playback...

recorder.resumeAudio(from: URL(string: "https://example.com/audiofile.mp3")!)
// Resumes audio playback...

recorder.stopAudio(from: URL(string: "https://example.com/audiofile.mp3")!)
// Stops audio playback...
Controlling Time
One of the significant differences between StreamUI and Remotion is how time and animation control are managed. In Remotion, video rendering is parallelized, meaning that everything needs to be coded in relation to the current frame. This can make it more challenging to reason about and manage animations and state changes because they must all be defined relative to the current frame.
In contrast, since StreamUI renders the view in real time you don't need to worry about parallelization which allows a simpler way of programming videos by providing a shared clock that can be used to synchronize animations and state changes. This shared clock ensures that all time-based operations are in sync, making it easier to manage and reason about the flow of your animations and state transitions. If you program any changes in your views with this shared clock, then if you pause the recording (for example if you want to wait for an API call) then your views will nicely wait until you are recording again.
Example with StreamUI
In StreamUI, you can utilize the ControlledClock class, which maintains a consistent and shared clock for all time-based operations. This allows you to advance the clock, sleep for specific durations, and reset the clock as needed. Here's an example:
private func startTimer() {
    Task {
        for iteration in 0..<5 { // Run for 5 iterations
            // Voting state
            isVoting = true
            showResults = false
            progress = 1.0

            // Count time the progress
            for _ in 0..<300 { // 3 seconds, 100 steps per second
                progress -= 1.0 / 300
                try await recorder?.controlledClock.clock.sleep(for: .milliseconds(10))
            }

            // Score state
            isVoting = false
            showResults = true

            // Show scores for 1.5 seconds
            try await recorder?.controlledClock.clock.sleep(for: .milliseconds(1500))

            // Move to next round
            currentRound += 1
        }

        // After 5 iterations, stop recording
        await recorder?.stopRecording()
    }
}
In this example, the shared controlledClock ensures that all animations and state changes happen in a synchronized manner.
Example with Remotion
In Remotion, the approach requires you to define everything in relation to the current frame, which can be more awkward and harder to manage:
const { fps } = useVideoConfig();
const frame = useCurrentFrame();

const roundDuration = 3 * fps;
const resultsDuration = 1.5 * fps;
const cycleDuration = roundDuration + resultsDuration;

const currentRound = Math.floor(frame / cycleDuration);
const currentFrameInRound = frame % cycleDuration;
const progress = Math.min(currentFrameInRound / roundDuration, 1);

const showResults = currentFrameInRound >= roundDuration;
Pausing Time
In StreamUI, you have the ability to pause time, which is particularly useful for managing background tasks and preloading assets. By calling recorder.pauseRecording, you can halt the recording process and stop all animations. When you resume the recording, everything will pick up exactly where it left off, ensuring a smooth and synchronized experience. While you are paused, no frames get added to your video.
Our StreamingImage, StreamingVideo, and audio components are designed to automatically pause the recording while preloading assets, ensuring your assets are present and visible as soon as you want them in the video.
Example
public var body: some View {
    VStack {
        if let image = image {
            Image(uiImage: image)
                .resizable()
                .aspectRatio(contentMode: .fit)
                .onAppear {
                    recorder?.resumeRecording()
                }
        }
    }
    .onAppear {
        recorder?.pauseRecording()
        Task {
            await loadImage()
        }
    }
}

private func loadImage() async {
    guard let url = URL(string: "https://example.com/image.png") else { return }

    do {
        let (data, _) = try await URLSession.shared.data(from: url)
        self.image = UIImage(data: data)
    } catch {
        print("Failed to load image: \(error)")
    }
}
Supported SwiftUI Views / Limitations
Please note. As it is written now we are at the whims of ImageRenderer, which comes with this warning
ImageRenderer output only includes views that SwiftUI renders, such as text, images, shapes, and composite views of these types. It does not render views provided by native platform frameworks (AppKit and UIKit) such as web views, media players, and some controls. For these views, ImageRenderer displays a placeholder image, similar to the behavior of drawingGroup(opaque:colorMode:).
| Feature | Status |
|---|---|
| Images | ✅ |
| Shapes | ✅ (Rectangle, Circle, Ellipse, Capsule, ...) |
| Path | ✅ |
| Divider | ✅ |
| Canvas | ✅ |
| Grid | ✅ |
| HStack | ✅ |
| ZStack | ✅ |
| VStack | ✅ |
| LinearGradient | ✅ |
| Animations | ✅ (They work, but seem to need to be based off the frame count / shared clock. See examples) |
| VideoPlayer | 🚧 (Only with StreamUI custom StreamingVideoPlayer. WIP) |
| Audio | 🚧 (StreamUI has a custom audio player that works. WIP -> Expect issues) |
| ActivityIndicator | 🚧 (I created a custom StreamingActivityIndicator you can use) |
| Button | ❌ |
| Map | ❌ |
| ScrollView | ❌ |
| Link | ❌ |
| Slider | ❌ |
| Toggle | ❌ |
| TextField | ❌ |
| Stepper | ❌ |
| Picker | ❌ |
| Gauge | ❌ |
| Menu | ❌ |
| SpriteKit | ❌ |
| SceneKit | ❌ |
Todo
- Video should be able to stream audio
- Advanced Video controls
- Better audio functionality
- Video lengths get messed up when audio is involved. Duration gets 2x longer. I currently trim the video to expected duration but it seems hacky
Comparison
You can see code here comparing creation of a video with the different libraries
The biggest differences between StreamUI and Revideo & Remotion:
- React/JS vs SwiftUI. Remotion uses React and Revideo uses generator functions. As a previous React lover, I strongly believe SwiftUI is the greater UI framework. Further, you can use any Swift library to help you out whereas with React and rendering videos in the browser canvas you are limited on what NPM modules you can use.
- Livestreaming capability. Neither Remotion or Revideo support live streaming or plan to (as far as we can tell). For them, supporting live streaming would be a massize change. For StreamUI with how it's built, adding live streaming was incredibly simple.
- Realtime rendering. StreamUI can achieve > 100fps on SwiftUI views. Remotion/Revideo utilize the browsers canvas to generate images and encourage parallelizing your video rendering using serverless functions. I have seen estimates of 1 frame taking seconds/minutes to render. However, I believe Revideo does have some impressive optimizations achieving faster than real time rendering. See Here. However, one thing I personally didn't like when using remotion was that everything has to be built relative to the frame number so that the parallelization can do its thing. It's akward but makes sense of course, but StreamUI doesn't have that requirement as frames are added to the video in realtime on the device it's being run. Potentially in the future we could do parallelization to get faster than real time rendering if desired
-
Browser vs Native. In remotion I was getting a lot of these depending on the NPM package I wanted to use. Maybe there is a way to work around it?
ERROR in ./node_modules/dotenv/lib/main.js 2:13-28 Module not found: Error: Can't resolve 'path' in '/remotion/node_modules/dotenv/lib' BREAKING CHANGE: webpack < 5 used to include polyfills for node.js core modules by default. This is no longer the case. Verify if you need this module and configure a polyfill for it.
Contributing
This is an open-source project, contributions are welcome! The goal of StreamUI is to be the most powerful library for programatically creating and streaming videos. Please open tickets, submit PRs or join the Discord
Inspired By
- Remotion
- Revideo
- Google Stadia
- Phoenix LiveView
Star History


