
cloudbuddy
CloudBuddy is the ultimate wizard for cloud storage. It uses rclone to connect to your cloud drives, download from them, upload to them, mount them to your file manager, and more. In addition, CloudBuddy features an interactive file browser to easily generate shareable links and to perform various server-side operations.
CloudBuddy
Bash-based GUI client for rclone. This was written by Botspot on 7/29/2021.
Installation:
Or, to download manually:
git clone https://github.com/Botspot/cloudbuddy
CloudBuddy is portable and can be executed from anywhere on your filesystem. For simplicity, this README will assume CloudBuddy is located in your $HOME directory.
First run:
~/cloudbuddy/main.sh
When running for the first time, CloudBuddy will:
- Check and install dependencies:
yad,xclip,rclone. Note: Ifrcloneis already installed withapt, CloudBuddy will overwrite it with the latest version ofrclonefrom source. - Add a Main menu launcher. (
~/.local/share/applications/cloudbuddy.desktop) This launcher is located under the Internet category. - Make sure the "
fuse" kernel module has been loaded so thatrclonecan mount drives. If fuse is not loaded, CloudBuddy will attempt to load it by runningsudo modprobe fuse. If that fails, CloudBuddy's mounting capabilities will be disabled and hidden. -
Check for updates. If the last local commit and the latest online commit do not match, CloudBuddy will run
git pulland refresh the script if it was modified. Note: If you make a fork of this repository, you should change the github URL in the script to point to your repository. To disable update-checking, create a file at:~/cloudbuddy/no-update.
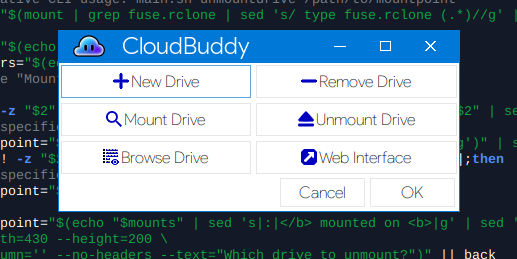
Usage
Note: CloudBuddy is intended to be self-explanatory. Everything should proceed in a logical fashon and nearly all users will have no problem using this program. But for those few users who wish to get acquainted with CloudBuddy before they try it out, here you go.
Connecting to a new cloud drive
This automates the rclone config process. Feel free to manually run rclone config for more options and a wider selection of cloud storage providers.
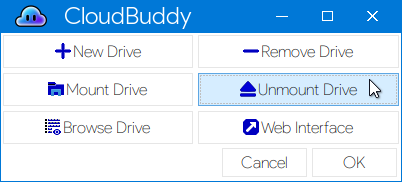
- In the main window, click this button:
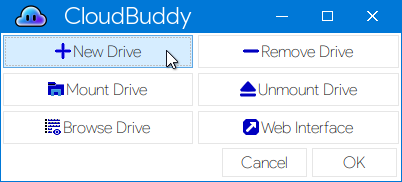
- Choose a name for the new cloud drive, and select which type of drive it is.
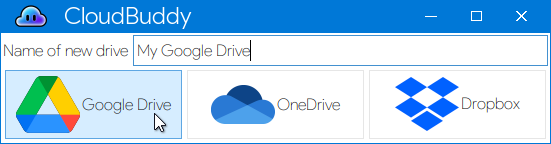
- Within seconds, a web browser will appear for authorization.
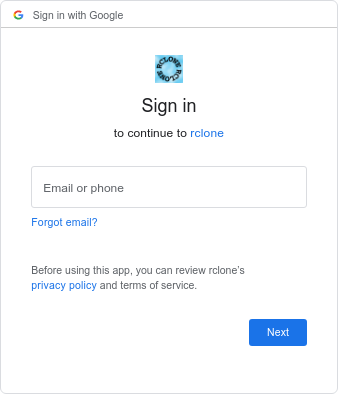
- That's it!
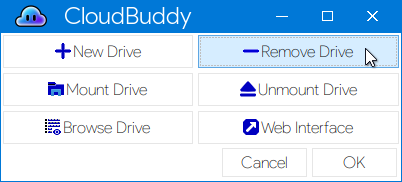
Disconnecting from a cloud drive
- In the main window, click this button:
- Choose a cloud drive to sign out of.
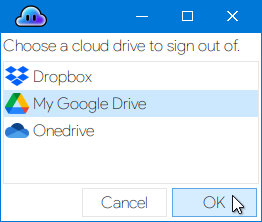
- That's it! First, this uses
rclone config disconnectto ask the cloud to revoke rclone's API key, then deletes the cloud drive fromrclone's config file usingrclone config delete.
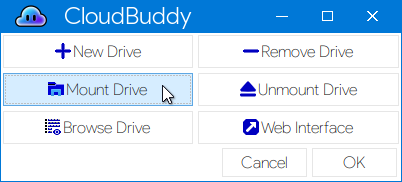
Mounting a drive
This uses rclone's mount command to view your cloud drive as if it was an external data disk.
- In the main window, click this button:
- Select a drive to continue.
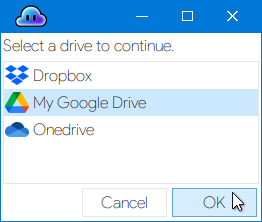
- Choose an empty directory to mount the cloud drive to.
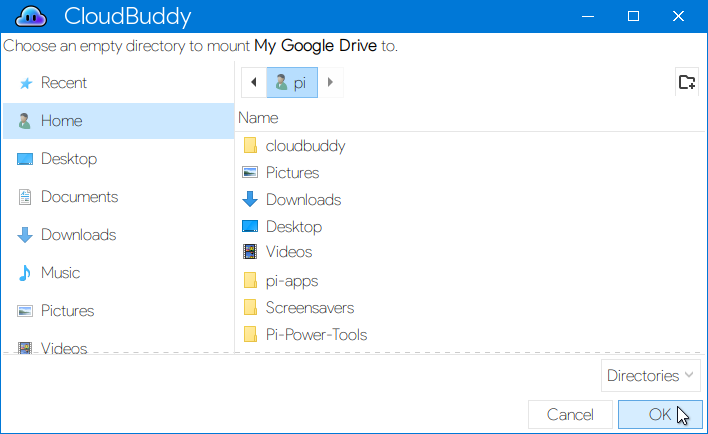
- Wait for it...
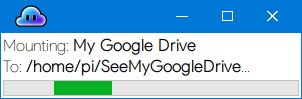
- Done!
Unmounting a drive
- In the main window, click this button:
- Choose a drive to be unmounted.
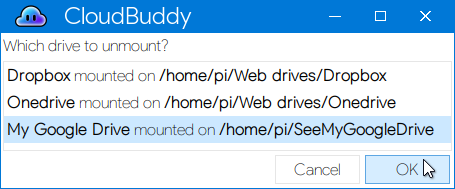
- Done!
Browsing a drive
- In the main window, click this button:
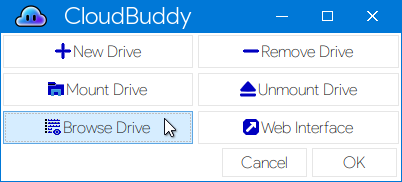
- Select a drive to continue.
- This is CloudBuddy's built-in file browser. It exclusively uses rclone commands for navigation and all operations are performed server-side.

The file browser is capable of:
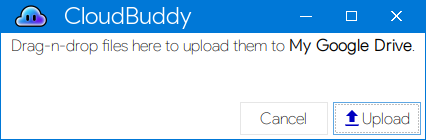
-
Uploading files or folders with this handy drag-n-drop window:
-
Downloading the selected file(s) or folder(s) from the list to $HOME/Downloads. This takes advantage of
rclone copy. Just look at that pretty terminal output!

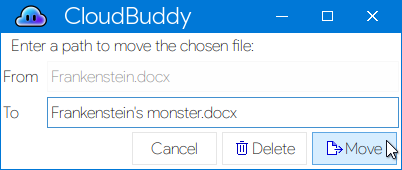
-
Moving or Renaming an item. This uses the
rclone movetocommand - it makes an API call to the cloud drive to perform the operation so no large downloads or uploads have to occur.
-
Deleting the selected file(s) or folder(s) from the cloud drive. This uses
rclone purgeorrclone deletefilecommands. Keep in mind that most cloud drives will keep deleted items in a recovery folder for a while. -
Creating a publically sharable link to the selected file or folder.
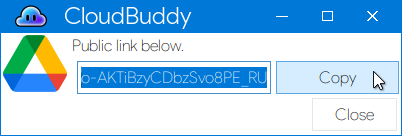
Notice the above Copy button. Because it usesxclipto copy the URL, CloudBuddy treatsxclipas a required dependency.
Web Interface
This simple button runs rclone's built-in browser interface.
- In the main window, click this button:
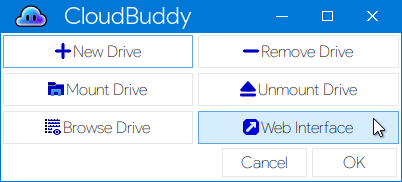
- A web browser should open with rclone's HTML-based interface.
Fun fact: I (Botspot, the maker of CloudBuddy) was not aware rclone had this feature until after CloudBuddy was mostly complete.
And with that, the GUI usage tutorial comes to an end. If CloudBuddy was designed correctly, you didn't have to read this to use CloudBuddy.
Command-line options
CloudBuddy is run by a single bash megascript. It's not that long a script though, so why do I call it called a megascript?
Because CloudBuddy's main.sh script is actually many bash scripts in one.
When you launch CloudBuddy, it will start at the top of the script, run a little preliminary stuff like update-checking, then skip nearly all the way to the end of the script and launch the main choice window. When you click a button, that window will run another background instance of CloudBuddy's main.sh with a command-line flag to preserve which button you clicked.
This approach has its downsides, but it is necessary for the main window to have a button layout of 3-by-2. Otherwise, all 6 buttons would be in one long row - which would look horrible and would prevent additional buttons from being added due to space constraints.
Did I mention that all CloudBuddy windows use yad? This dialog box utility is the most robust GTK dialog available for bash scripting, and is the basis of Pi-Apps, Pi Power Tools, YouTubuddy, Update Buddy, The TwisterOS Patcher, and Windows Screensavers for RPi. YAD is not perfect though, and its inability to display multiple rows of exit-code-type buttons is a major hindrance.
Enough said. Command-line options for CloudBuddy are below.
PRO TIP: if you run CloudBuddy in a terminal, it will dynamically generate a custom-tailored command to instantly reach the exact same place later. For example, if I was using the file browser and wanted to quickly reach a deep subdirectory later, this information would be very helpful:

Set up CloudBuddy and then exit
On every launch, CloudBuddy checks for dependencies and creates a menu launcher. To run this preliminary stuff and then exit immediately, use this command-line flag:
~/cloudbuddy/main.sh setup
Source CloudBuddy's functions and then exit
Necessary for when CloudBuddy is downloading or uploading something in a terminal and we want to reuse CloudBuddy's colorized-echo functions.
source ~/cloudbuddy/main.sh source
More functions may be added in the future, but at the time of writing this they are: error, warning, echobright, echocommand, echoprogress, list_descendants, back, drivetype, and choosedrive.
New drive
~/cloudbuddy/main.sh newdrive
Optionally, a drive name and drive type can be specified (in that order) on the command-line to skip launching the selection window.
Remove drive
~/cloudbuddy/main.sh removedrive
Optionally, a drive name can be specified on the command-line to skip launching the selection window.
Mount drive
~/cloudbuddy/main.sh mountdrive
Optionally, a drive name and mountpoint can be specified (in that order) on the command-line to skip launching the selection window.
Unmount drive
~/cloudbuddy/main.sh unmountdrive
Optionally, a drive name, OR a mountpoint can be specified on the command-line to skip launching the selection window.
Browse drive
~/cloudbuddy/main.sh browsedrive
Optionally, a drive can be specified on the command-line to skip launching the selection window. Additionally, you can specify a subfolder to begin in, like this:
~/cloudbuddy/main.sh browsedrive "My Google Drive:Attachments/old stuff"
Additionally, a simpler, faster file browser can be launched if the fastmode variable is set to 1, like this:
fastmode=1 ~/cloudbuddy/main.sh browsedrive
Web Interface
~/cloudbuddy/main.sh webinterface